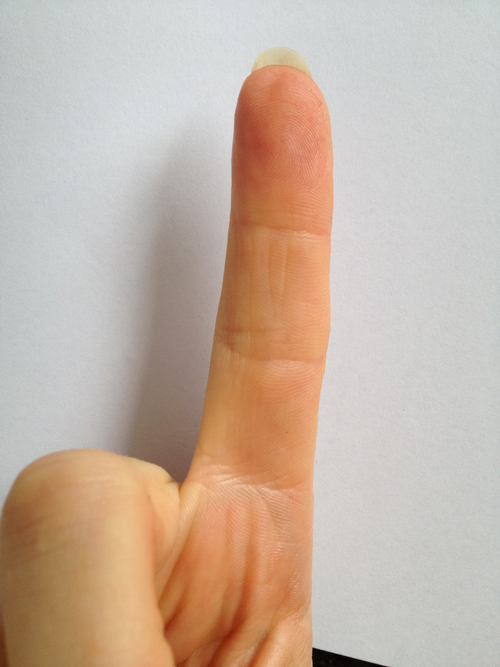
Step 1.
Take a photo of your
index finger over a sheet of white paper. Make sure the lighting
is adequate, without shadows and don't use the flash.
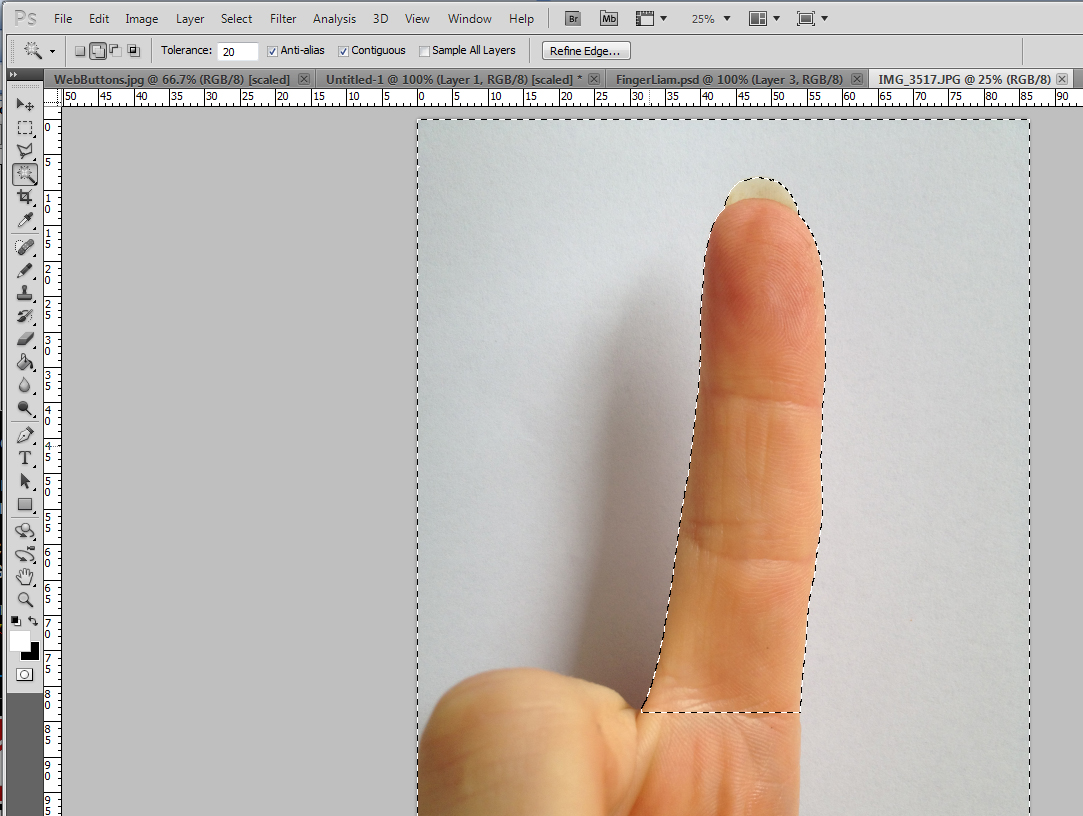
Step 2.
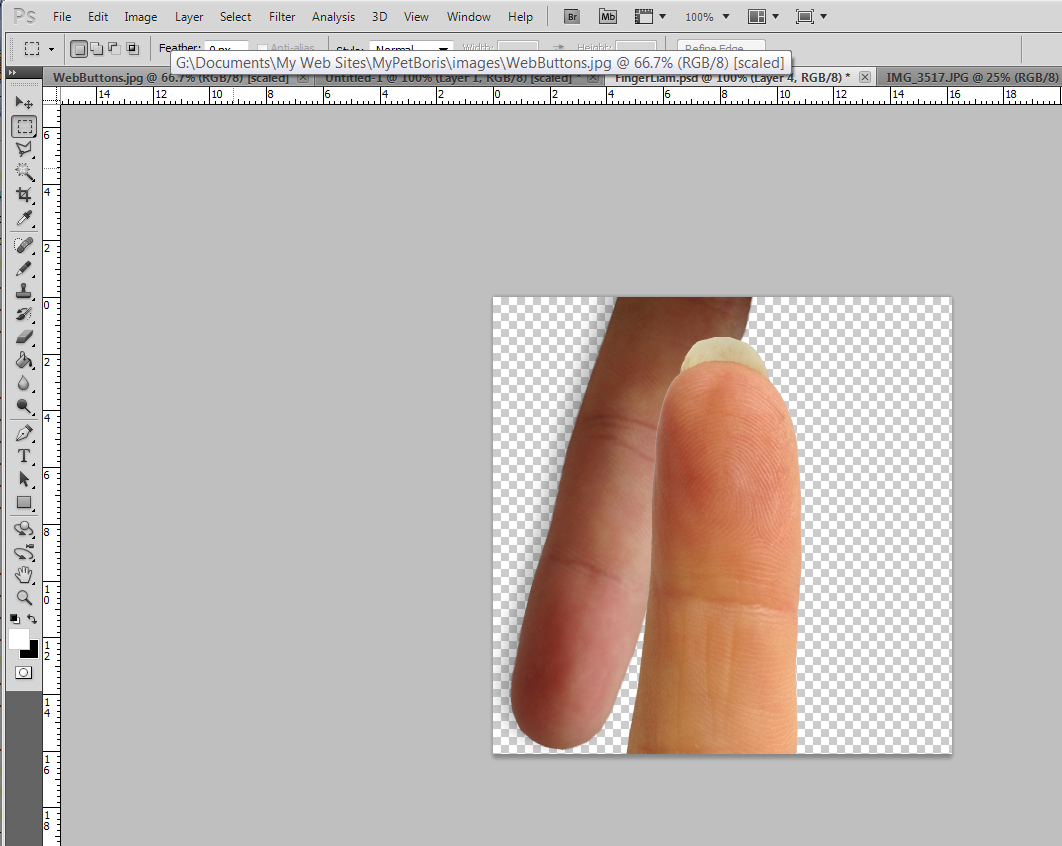
Open the photo in Photoshop and select just the finger using the Magic Wand tool (tolerance 20, anti-alias) or Polygon Lasso tool. Copy the finger to the clipboard.
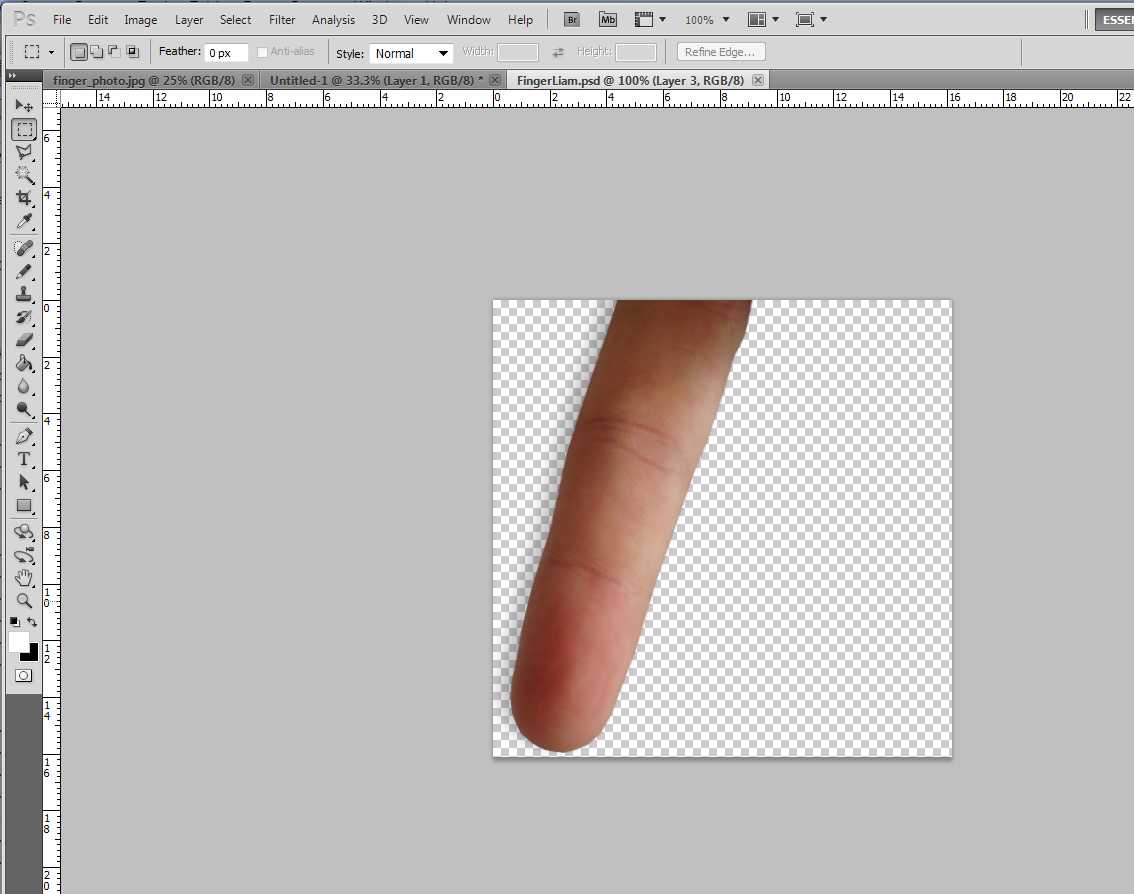
Step 3.
Copy one of the existing finger graphics (to use as a guide) from our custom finger page and save it to your computer. Open this file in Photoshop.
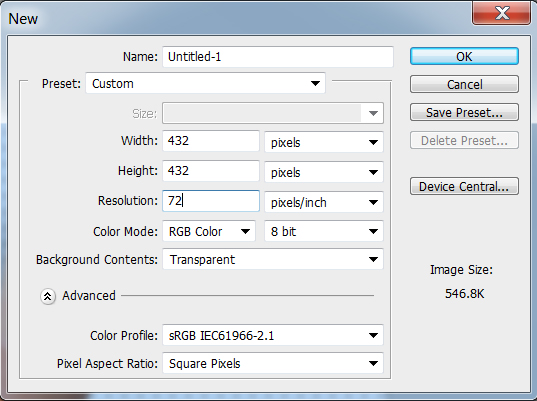
Alternatively you can create a new blank file using the following settings:
Step 4.
Paste your new finger over the top of the existing file which will create a new layer.
Step 5.
Scale and rotate the finger to match the existing one
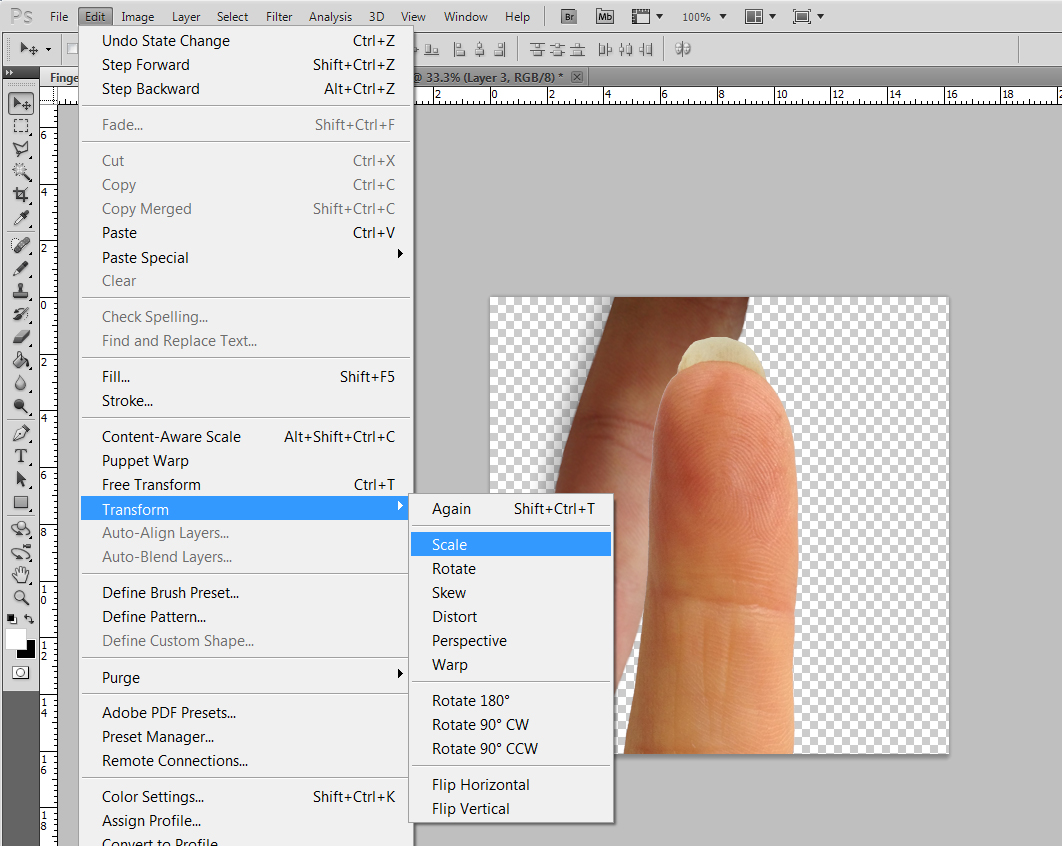
Scale Finger
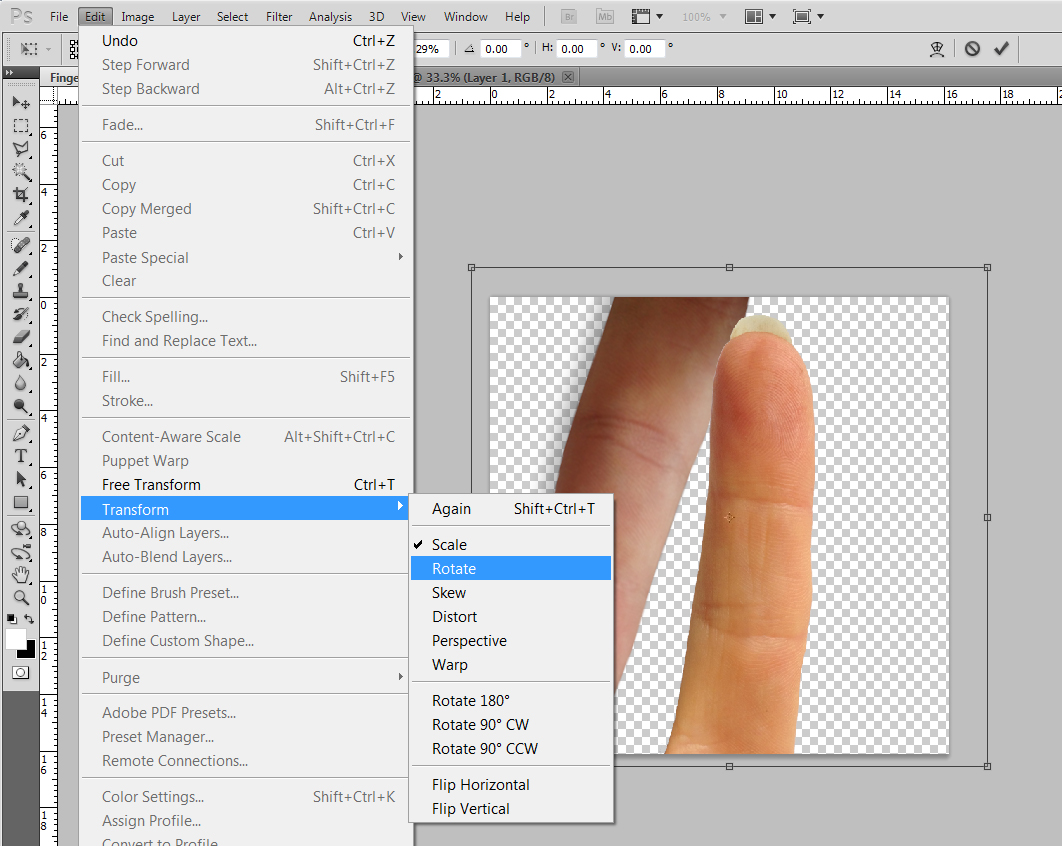
Rotate Finger

Note: Make sure the finger tip is in the same place as the original one.
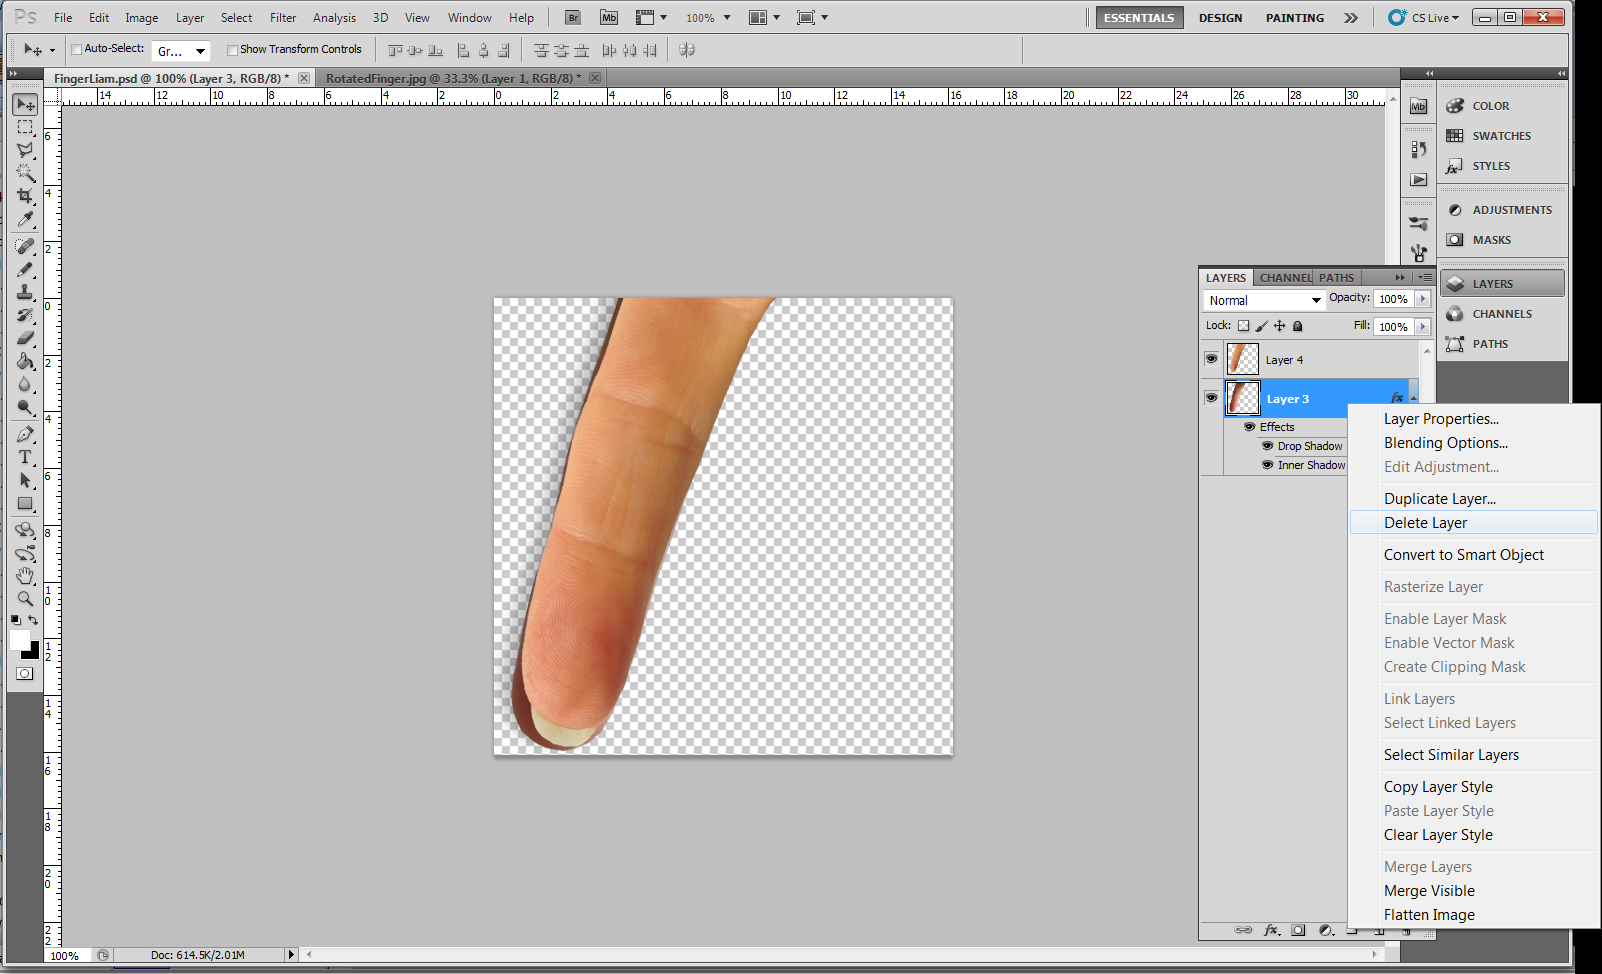
Step 6.
Delete the original finger layer
Step 7.
Add a
Drop Shadow.
Right click the finger layer and select "Blending Options", then
"Drop Shadow".

Opacity:
47%
Angle: -29°
Distance: 12
Spread: 4
Size: 18
Step 8.
Add an
Inner Glow.
Right click the finger layer and select "Blending Options", then
"Inner Glow".
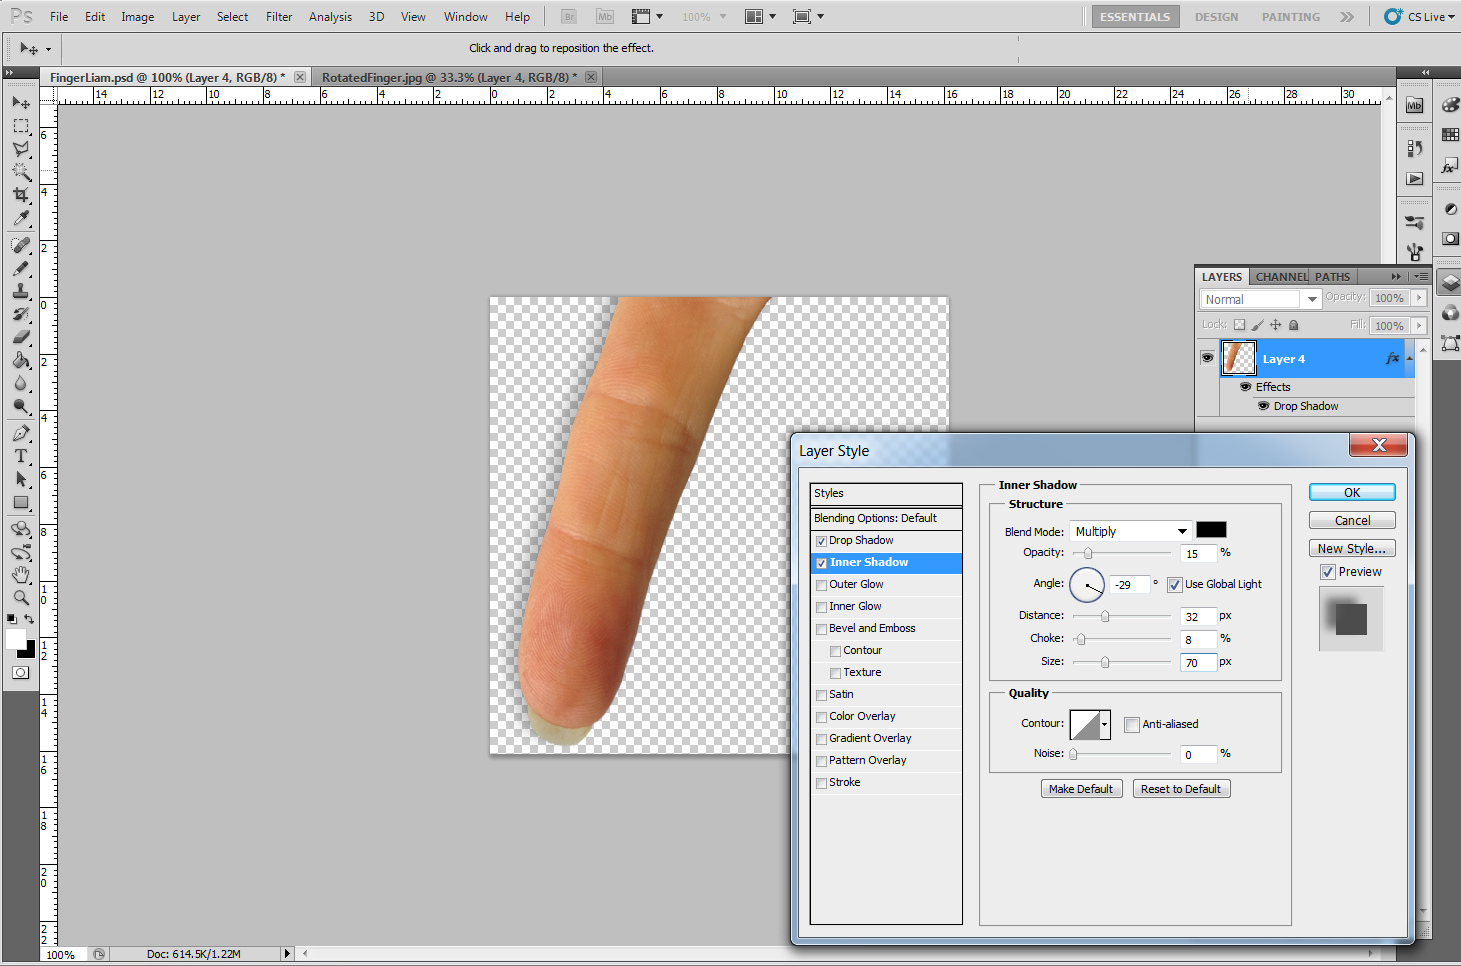
Opacity:
15%
Angle: -29°
Distance: 32
Choke: 8
Size: 70
Step 9.
Save as a .PNG File e.g. "myfinger.png"
Step 10.
Now you
need to get it on your device so the app can use it.
a) You can connect your device via USB and copy it to your
device.
b) You can email it to yourself and then read the email on your device.
c) You can load it onto your own web page then save it to your gallery.
Save the finger graphic to your device's "Image Gallery"
Note: Make sure it is copied to your phone's image gallery not the SD card otherwise the app may not be able to find it causing a crash.
If you have any difficulties or have suggestions on doing this better please let me know via email.
Custom finger service
If this is all too much for you, then for a small fee (US$5) we can create the file for you if you email a photo of your finger to us. See our store page for details.
