DETAILED
INSTRUCTIONS
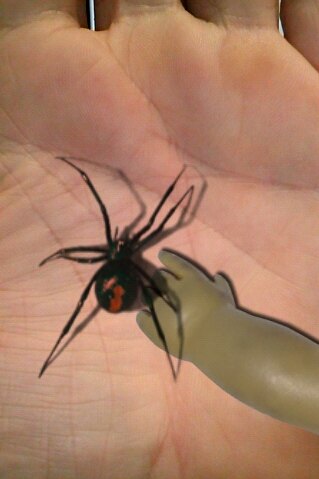
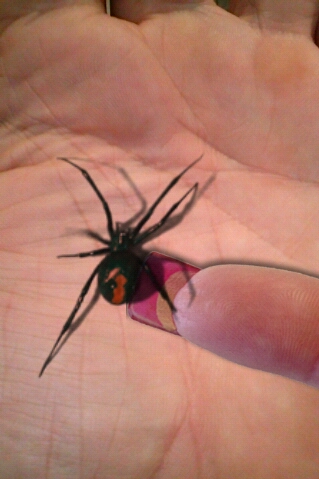
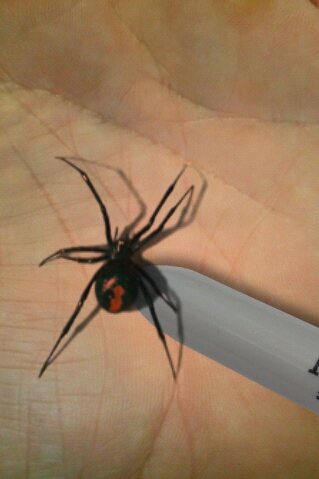
The Spider
Plastic spiders are readily available from most good toy or party supply stores. You can find them at any shop who sells Halloween decorations and are used as table decorations or in fake spider webs.
A good type of spider for this effect comes with Jim Pace’s The Web which can be purchased from your local magic shop or online through internet magic dealers. You get one spider with each pack plus the special cards.
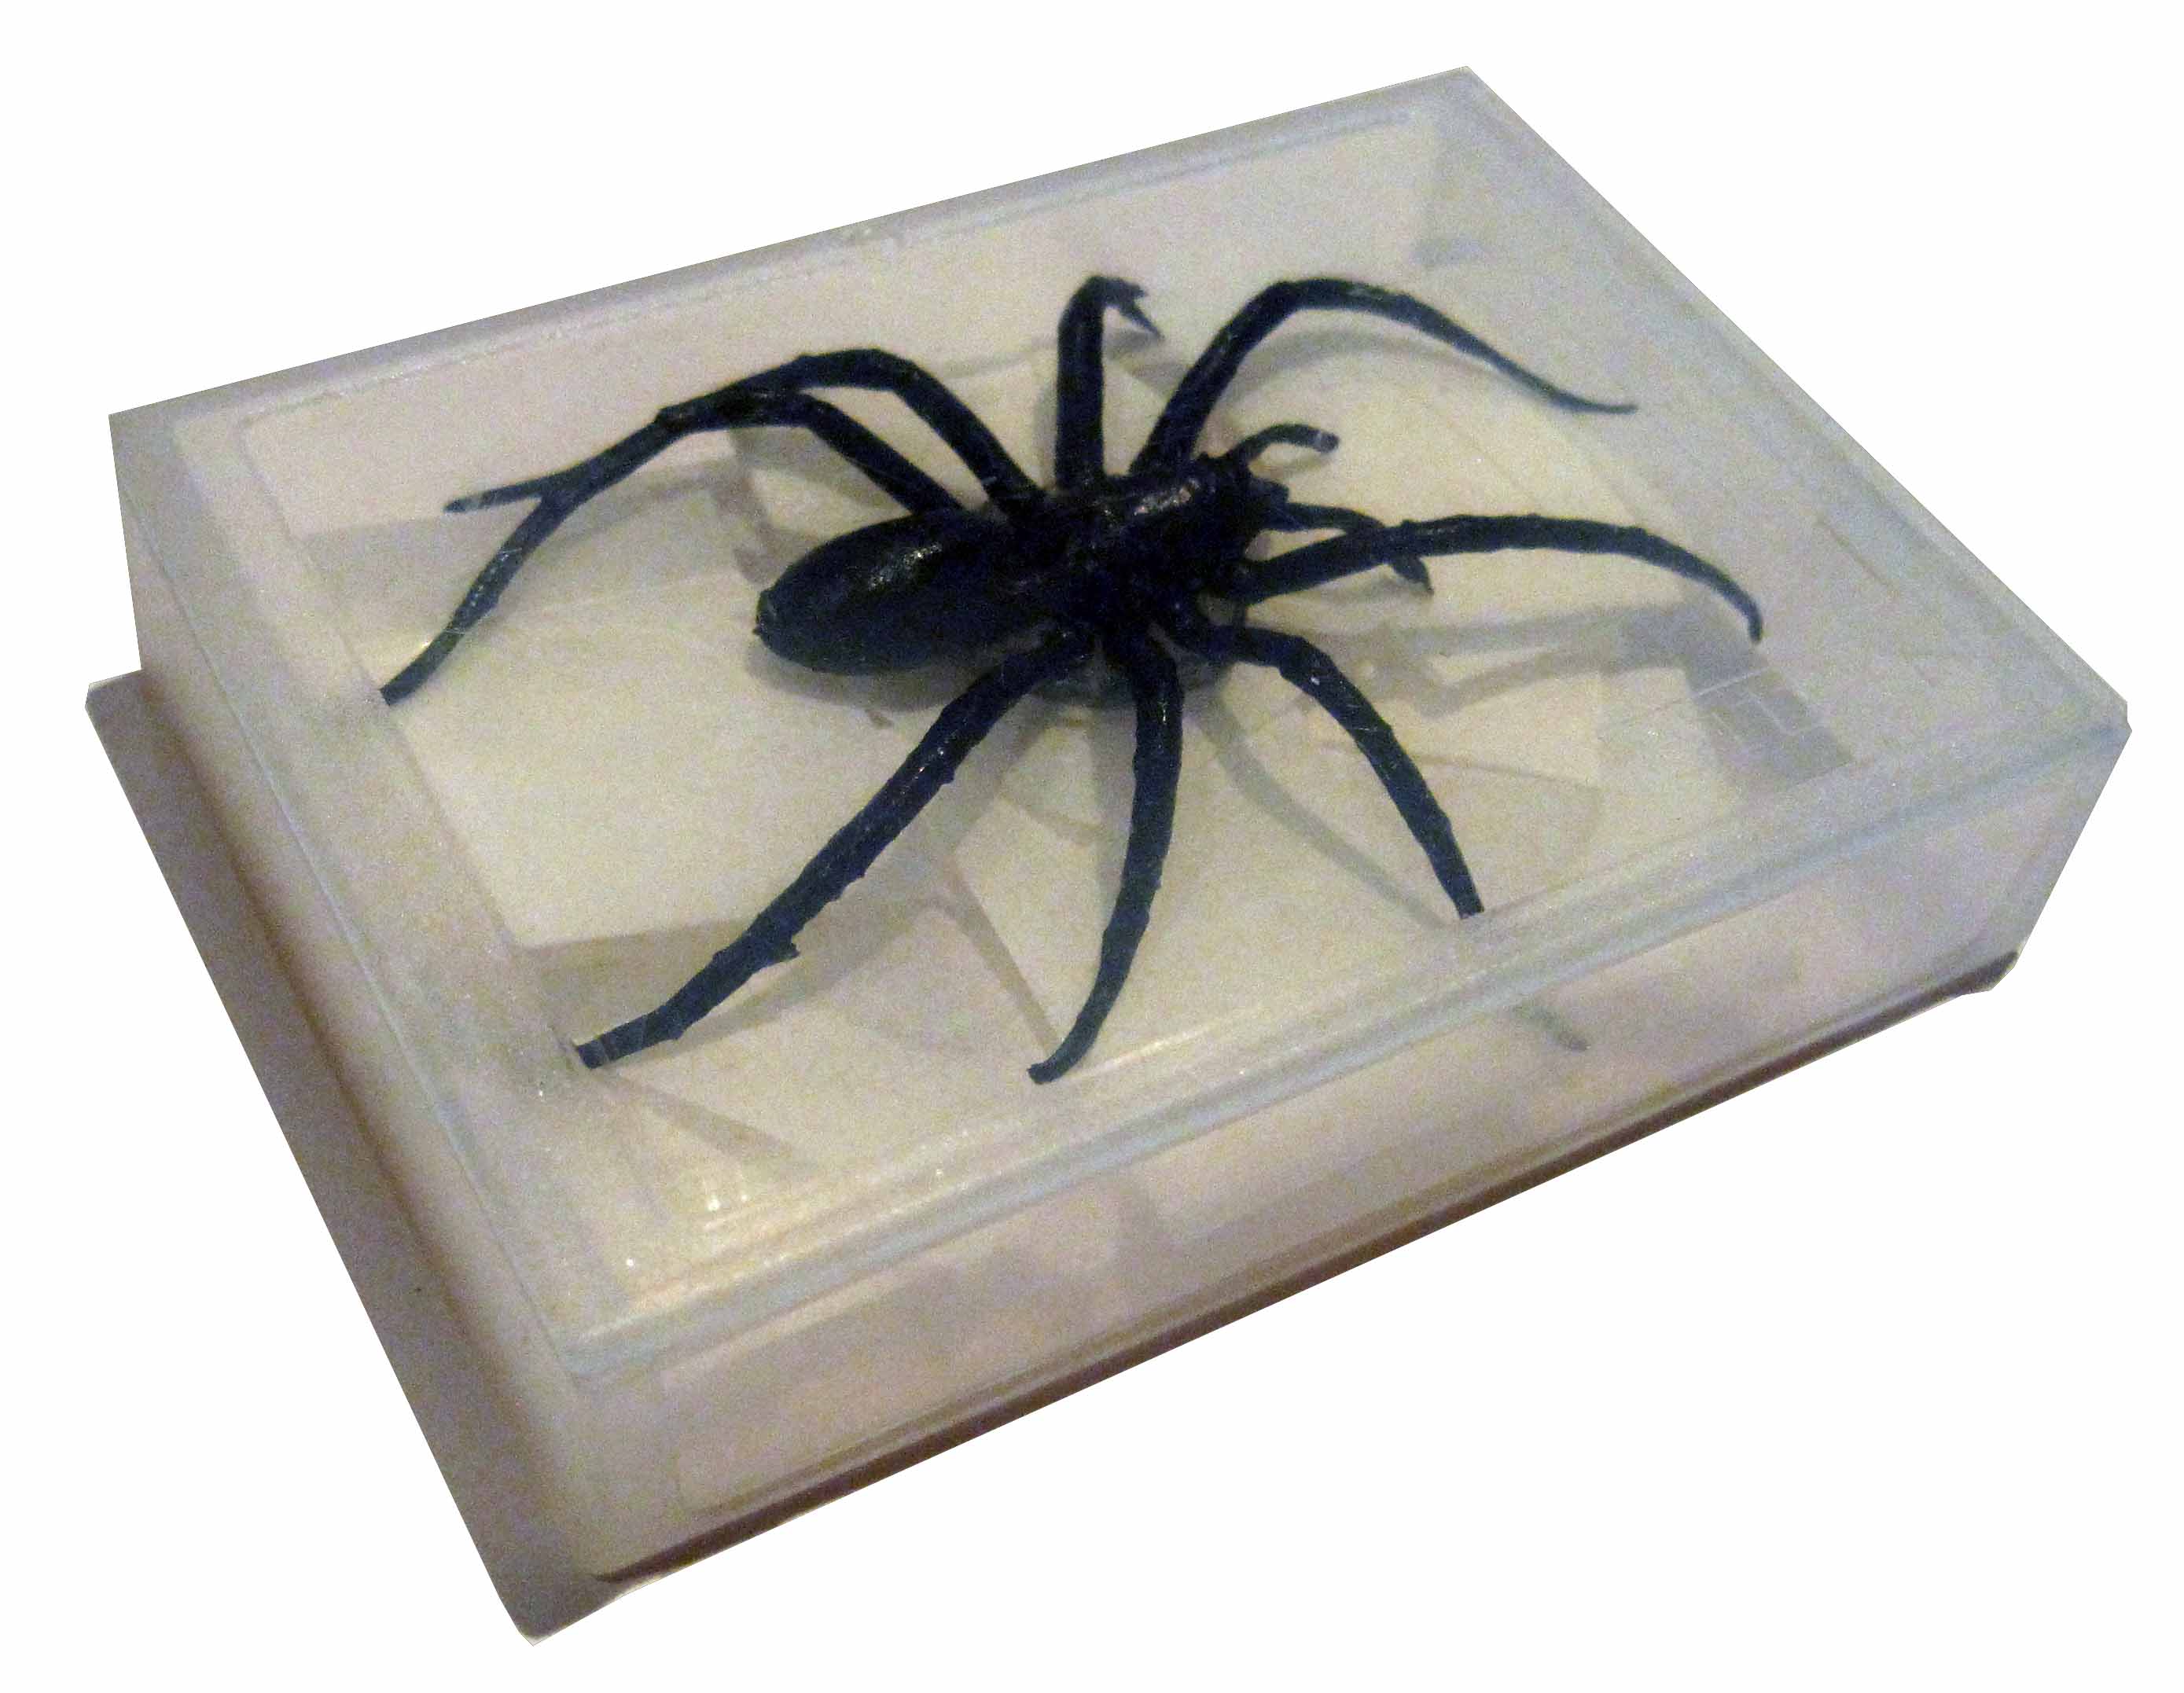
You want to choose a spider that is lightweight and has a flat base which makes sticking to the back of the hand easier.

The ones I use measures approximately 50mm or 2” from front to back and side to side. I would recommend that you buy several spiders as they can sometimes go flying or the legs get broken off by the involuntary moves of terror of your freaking out victims. Sorry I mean spectator. :-)
You can also purchase the best packs of spiders and adhesive through our online store.

The Adhesive
The spider needs some adhesive on the bottom so that it will easily attach to the spectator’s hand.
· 3D ZOTS ™
The best adhesive I have found so far is 3D ZOTS™ from Therm-O-Web. They are a dome shaped clear silicone disk that are extremely sticky. They come in a pack of 125 singles which are individually wrapped or a roll of 200. They are hard to find in some countries so you can purchase them from our online store.
I have made packs of 50 and 100 3D singles which you can buy through our online store.
IMPORTANT TIP: I would recommend you only use each dot once or twice and then change them as you do not want the spider falling off mid-trick. Avoid touching the surface of the dot as this will reduce their stickiness.

· RHINO GRIP
The best tape I have found by far is RHINO GRIP 50-540 Double Sided Acrylic Adhesive Strip and it is really great. Extremely sticky carpet layer’s tape. It is so good that the spectator has to flick it a few times to get the spider off and even then it stays put. It can be a little awkward to use because it sticks to everything, but it doesn’t leave any residue and rolls up into a ball when removed. Available at Home Depot, Carpet layers supplies or you can purchase directly from us. Email support for prices and details.
· DOUBLE SIDED TAPE
Get the kind with a thin layer of foam in between two double sided tapes. Cut a small strip approx 18mm x 7mm or 11/16” x 1/4” and attach this to the base of the spider. If the tape won’t stick to the spider then rough up the base of the spider with a little sand paper or use a better tape.
· BLU-TACK
Jim Pace's the web comes with a piece of Blu-Tack. You may find this more convenient but I found it doesn't stick anywhere near as well as the ZOTS or Rhino-Grip
IMPORTANT TIP: Avoid using people who have wet hands or very oily/freshly moisturized skin as none of the adhesives will stick to wet or oily skin.
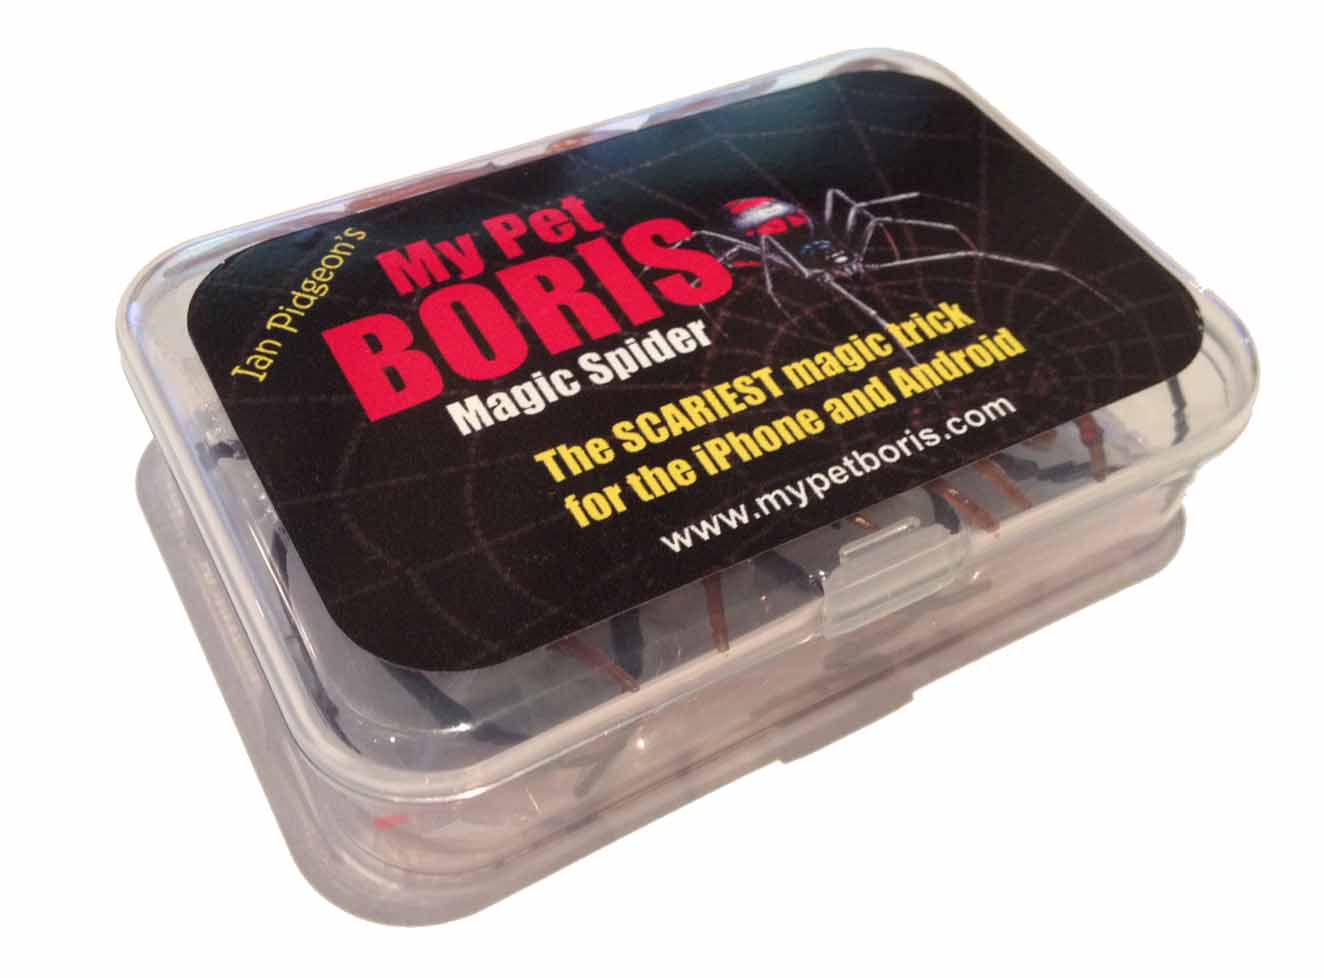
Protective Case
The Pro and Mixed Packs from our online store are made specifically for this effect and comes with a pocket sized polypropylene box which is just perfect for carry your gimmicks and adhesive with you all the time. Our butterflies also fit inside this case.
Michael Ammar suggested to use a Mini DV (Digital Video) box if you don't have a PRO-PACK to keep your spider in while carrying in your pocket so the legs don't get broken.
It also stops the adhesive sticking to you or picking up lint from your pocket.
Try and find a white Polypropylene MiniDVD case (TDK use then) as they are not as brittle as the hard clear ones. I keep a couple of extra ZOTS™ in the case as well. Also leave the backing paper on the ZOT™ until you are ready to perform.
A great tip from the master Micheal Ammar!
A few words of WARNING!
Take care to choose your audience well for this effect. I would suggest performing it for family and friends or a group of people who are out having a good time.
It
is not for everyone. I find it works best on teenage girls and young women.
I would not perform it for very young children or for the elderly as the
finale is similar to a good scare in a horror movie or a ride on a roller
coaster.
I would normally choose the more boisterous person in the group with a
friend standing on either side. This will provide a level of emotional
support and help to convert the adrenaline into laughter at the end which is
a very important part of this effect.
Done correctly the reaction will be amazing and the group will take a long
time to return to a normal level of excitement.
I
generally wouldn't do it for a solitary person without friends around as
this doesn't offer the same level of support and conversion to laughter.
I think it is important for them to realize the effort you have gone to in setting up the scam. There is a lot of psychology in play. In the end it is just an animation and a plastic spider. You are just creating a fearful illusion in their mind. Nothing is real.
Arachnophobic Test
One of the main benefits of using the app over the original card trick "The Web", is that the spider is introduced right at the beginning of the effect instead of at the end.
With the "99" second pauses in place (See Advanced Timing below) they only see a small part of the spider so you have a chance to abort the trick if you get an adverse reaction.
Make a point of getting a firm hold of their fingers at the beginning. If you feel them curling up their hand or pulling away and especially if they are not able to look at the screen then you can simply remove the spider and take back your phone then and there. And make sure you do. If they cannot look at the screen then there is no point continuing with the effect.
You can easily ask for someone else's hand, stick the spider and continue from where you left off.
The Magic Spider Application
The My Pet Boris application is fairly straightforward to use. It is
basically a animation of a spider walking across the screen without the
video controls of the phone with an animated finger and some timed
vibrations.
Think of it as a tool to create the ambience for the effect.
There are a few versions of the main screen:
Version 2.1 Before Upgrade:
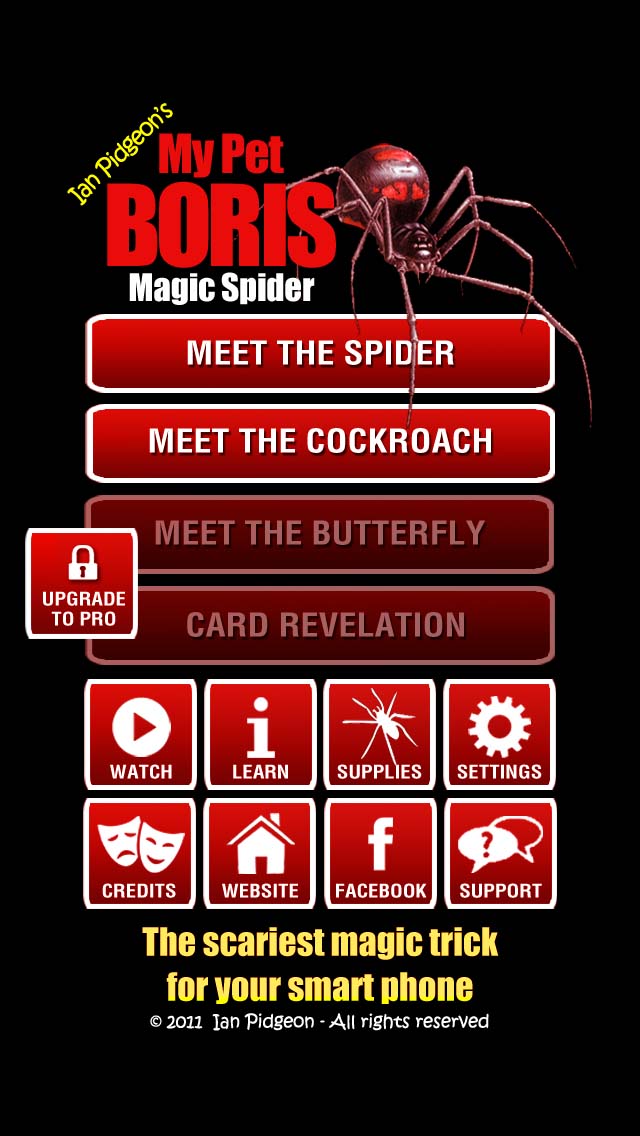
Version 2.1 After Upgrade:
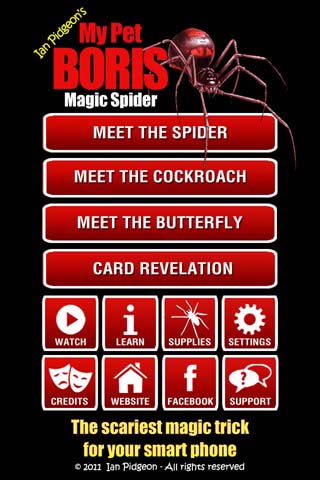
Version 2.0 and earlier after upgrade.
From the main screen you have a number of features,
· Meet the spider - plays the spider animation based on your settings. If you click over the middle of the button it will play the original Boris effect. If you click over the card it will play the new card revelation effect. Or for the new V2.1 screen there are now separate buttons for the spider and card revelation effect.
· Meet the cockroach - plays the cockroach animation.
· Meet the butterfly - plays the butterfly animation. (In-app purchase required - Price may vary by country - Approx US$2.99) This feature also unlocks the custom finger and card revelation features.
· Watch - plays the video trailer with performances and reactions
· Learn - you can read the in-app instructions, FAQ or watch the full instructions on our website.
· Supplies - visit our online store for spiders, cockroaches and adhesive the background, capture or library image, set a custom start up screen, and change the skin tone of the finger to match your own
· Credits - meet the creators and where the idea came from
· Website - visit the MyPetBoris.com website. There are videos, instructions and a frequently asked questions (FAQ) section.
· Facebook - visit our app page on Facebook for news, tips and information on updates. A great place to share ideas with other people performing the effect. There are also lots of custom Startup Screens.
·
Support
- Email
us if you have any questions or need help. Please provide enough information on what it is you need and how we can
contact you. For Android users, if you have any crashes then Report through
Google so I can see the details of the problem but also email me so I can
follow up with you on how to resolve it or what I am doing to help you.
Google reporting does not provide any way to communicate you.
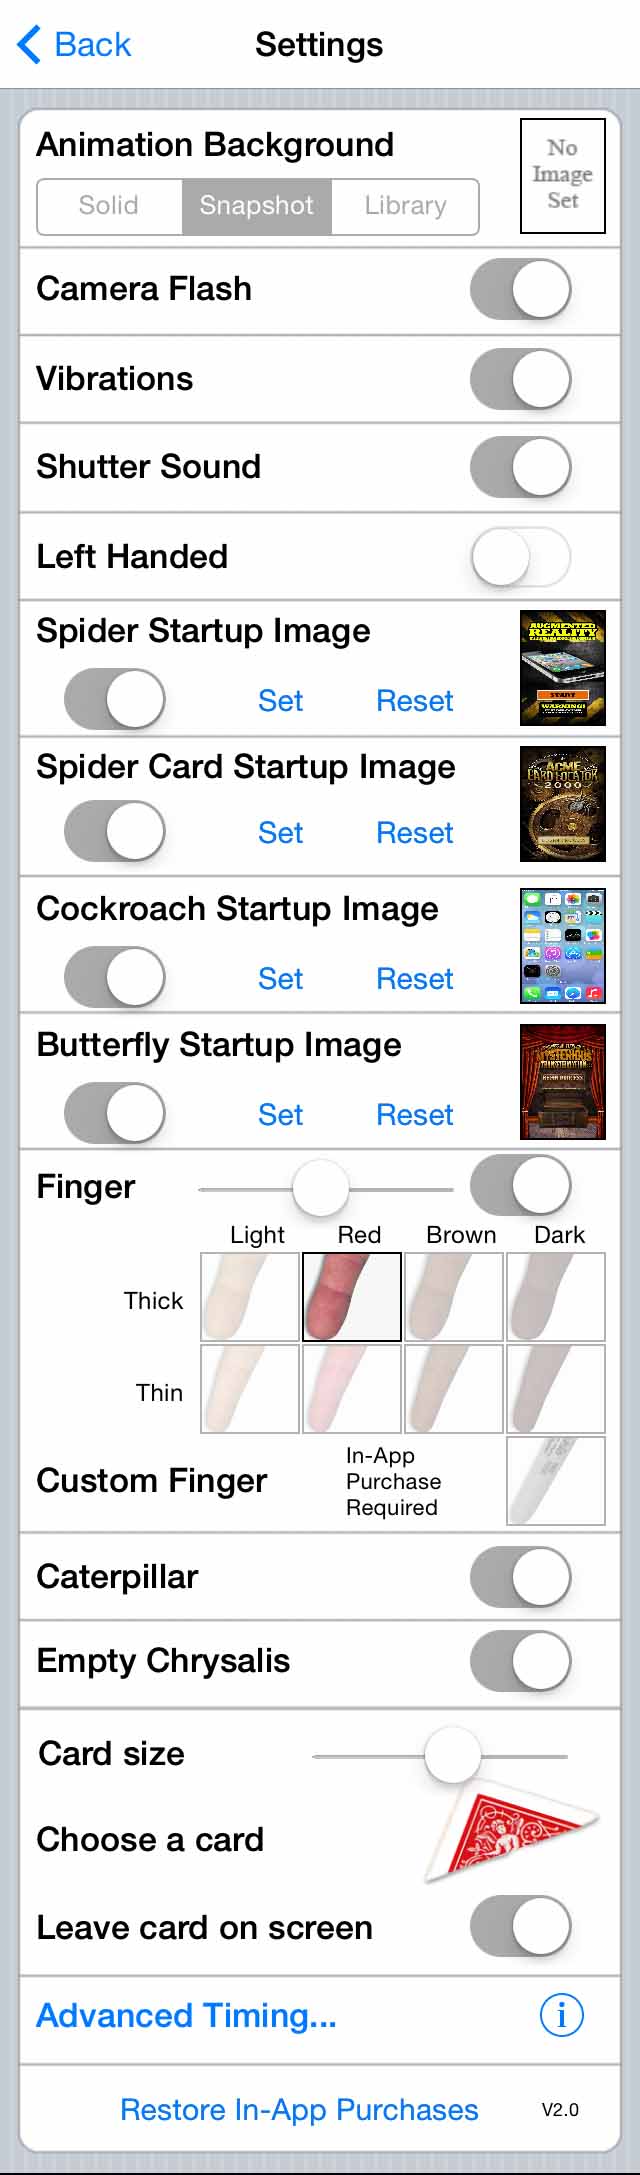
Settings Screen
Before you run the animation, you should visit the settings screen. (image from V2.0 for iPhone and Android shown)

·
Animation
Background
You can choose the solid white background, capture a picture of the
spectator’s hand or any other image, or choose a file from your image
library. Make sure the image is full screen and portrait. Use the
gallery to resize and then take a screenshot. Use the screen shot as your
image.
·
Camera Mode (ANDROID only)
The cameras on each ANDROID device all seem to operate a little differently.
There are three different modes. Use
DEFAULT
if you have an older device. Use
QUALITY if you have a new device
and use NATIVE
only if none of the others work as it adds an extra step. If the app crashes
then come back and try a different mode. Use "QUALITY" if you can as it
produces the best image.
·
Flash
You can turn the camera flash on or off.
ANDROID users:
Use torch mode if you can. some devices don't support the standard so you
may need to try a different mode by selecting a new mode from the popup
list. Try 'torch', 'on', 'auto' in that order. Then try any others. Use
without flash 'off' if nothing else works.
·
Vibration
You can turn the vibration on or off. I think the vibrations add to the
effect.
·
Sound
You can turn the camera shutter sound on or off. Again I think it adds to
the effect.
·
Left Handed
The finger will enter from the left side of the screen.
·
Focus (ANDROID only)
Allows you to manually focus before taking the picture. Try and use "auto"
flash mode unless your device does not support it.
"Macro"
would be the next best choice.
·
Startup Image
You can turn the
Startup Image option on or off. The "Set" button allows you to choose an image from your
image library or you can "Reset" to the default startup page that comes with
the App.
TIP: There are now a couple of different
default startup images to choose from, just click the "Reset" button
repeatedly to cycle through the built in selections.
The Startup Image feature is meant to give you the ability to customize the app to suit your own style and patter. This was a suggestion from Gregory Wilson. We will load some suggestions for you on our website and Facebook page. Feel free to send us your ideas as well and we will load the best for others to use.
See our FaceBook Page Photo Section for a selection of Startup Screens.

TIP: You can save these images to your gallery if view this page from your phone, by clicking and holding on the image above until the "Save Image" menu appears. (You may need to be using a browser to do this.)
TIP2 : You can capture a screenshot image on your iPhone screen by pressing the "Home" and "Power" buttons at the same time. For Android check with your manufacturer. This stores the screen shot to your camera roll/image library.
·
Choose a finger
There are eight
different built-in finger styles to choose from. There are "thick" and "thin" as well as light,
red, brown and dark skin tones. The finger doesn’t have to match exactly
because of the light and refraction through glass. Just pick one that is
closest to your own.
TIP:
If you are in a bright sunny location use a light or
red finger, inside or in a darker environment use the brown or dark finger.
·
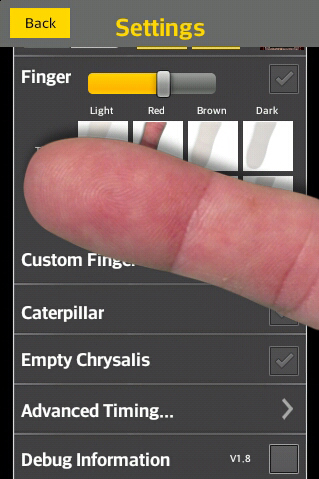
Finger Sizer slider (NEW FEATURE)
You can now
resize any of the inbuilt or custom fingers using the slider bar in the
finger section.
Sliding the slider bar left or right will display an example of the finger.
Move it until the finger matches your own's size. The finger sizing image will show for
an additional 4 seconds after you release the slider.
All other controls are disabled while the finger sizer is showing.
·
Custom Fingers (from V1.8)
If you have
purchased the butterfly In-App purchase, you can import an image of your own
finger instead of using the standard fingers. This is particularly helpful if
you have an unusual shaped finger or long finger nails. You can also use
other objects like a sharpie or Michael Ammar's baby hand for example. See our
Custom Finger page
for more details.
·
Caterpillar
Shows a
caterpillar crawling across the screen at the start of the butterfly
animation. Turn this off if you would like a shorter routine. Personally I
think it is a bit long with the caterpillar but it is included for those
that don't.
·
Empty Chrysalis
Instead of showing a caterpillar you can
start with the chrysalis. You can place a foil wrapped magnet (Magic Seed) on the palm of
the hand and the empty chrysalis will hide it for the rest of the effect.
If you place the "Magic Seed" on the hand and a small flat magnet or shim on the back of your phone cover the seed will stick to your phone when it is placed on their hand, giving the impression that the seed transformed into the chrysalis.
·
Card Size
Allows you to size the card so it will
seem to be the same size as the card you produce. Hold the card over the top
of the screen as a guide to get the correct size.
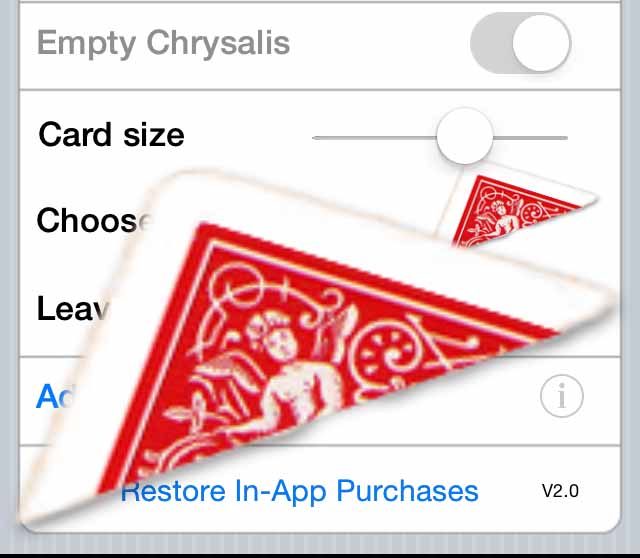
·
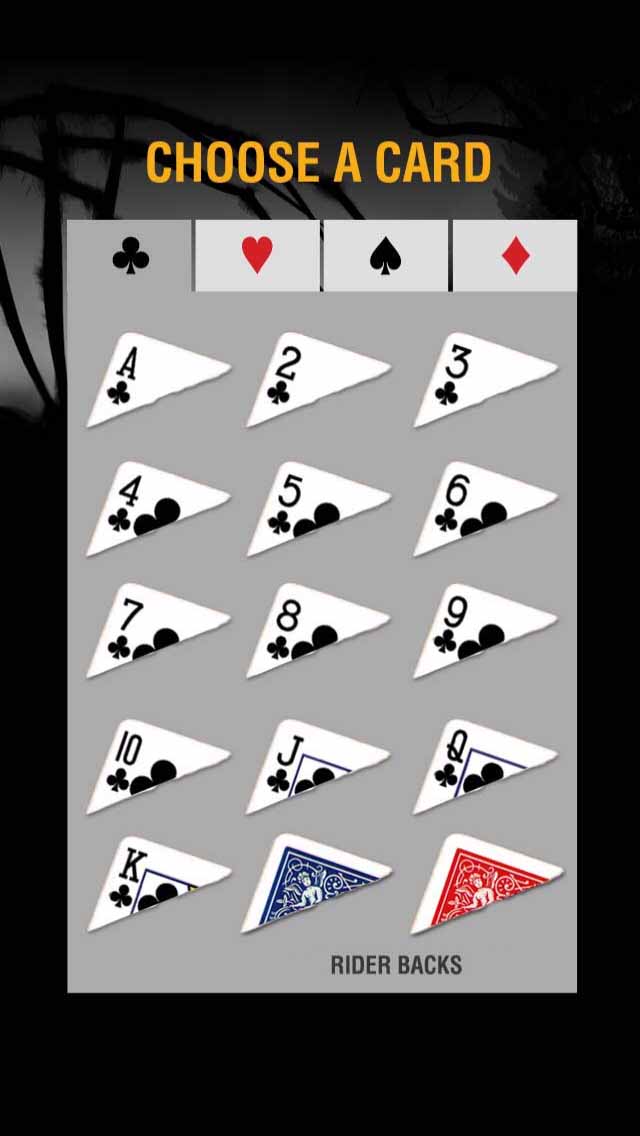
Choose a card
Click on the card image to bring up a
chooser screen. You can choose any card face or the back of Bicycle Rider,
Phoenix, Tally-Ho Circle or Fan Back cards. Click the card to select and
return to the Settings screen.
·
Leave
card on screen
You can choose to have Boris leave the card
on screen or take it off with him. If you leave on screen, then the card
will be dropped as he crosses the screen. You can then move it around with
your finger, then produce it from under the phone.
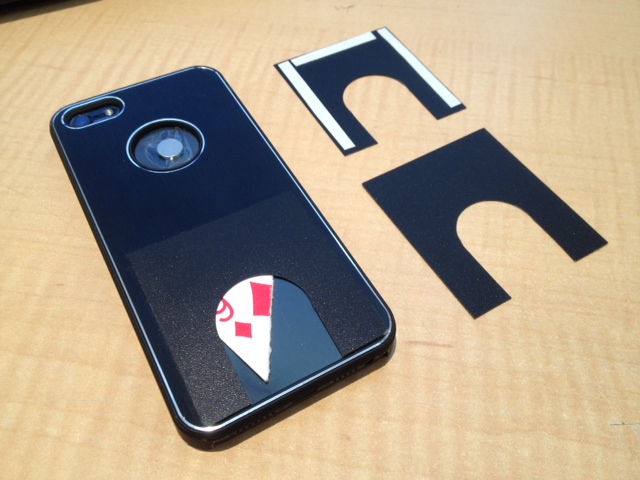
TIP:
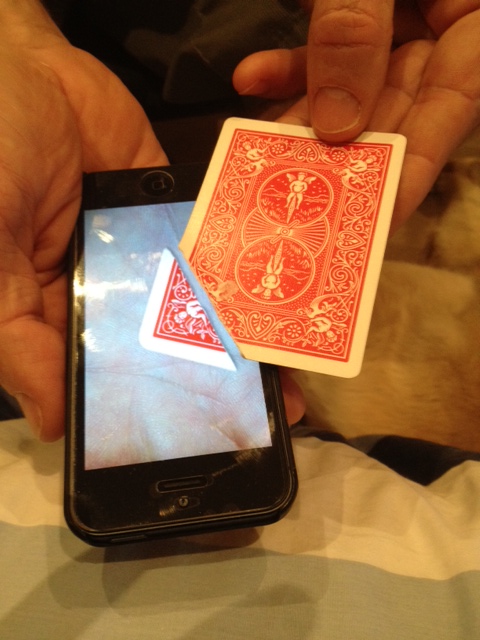
I have devised a clear
plastic card holder to hold the card on the back of the phone and make the
reproduction easy. The holder ensures that the card is in the correct
position and more importantly the participant cannot feel the card on the
back of the phone during the effect as the plastic feels like a phone cover.
You get one card holder with each
"Mixed
Pack" from our webpage store.
If you really don't
want to have all this "crap" on the back of your phone all the time, why not
get a second phone cover and put it on only when you want to perform, then
put a normal one on when you are not?
If the card is moved to within 20 pixels of any edge of the screen it will vanish. See the video below for more information on this feature.
·
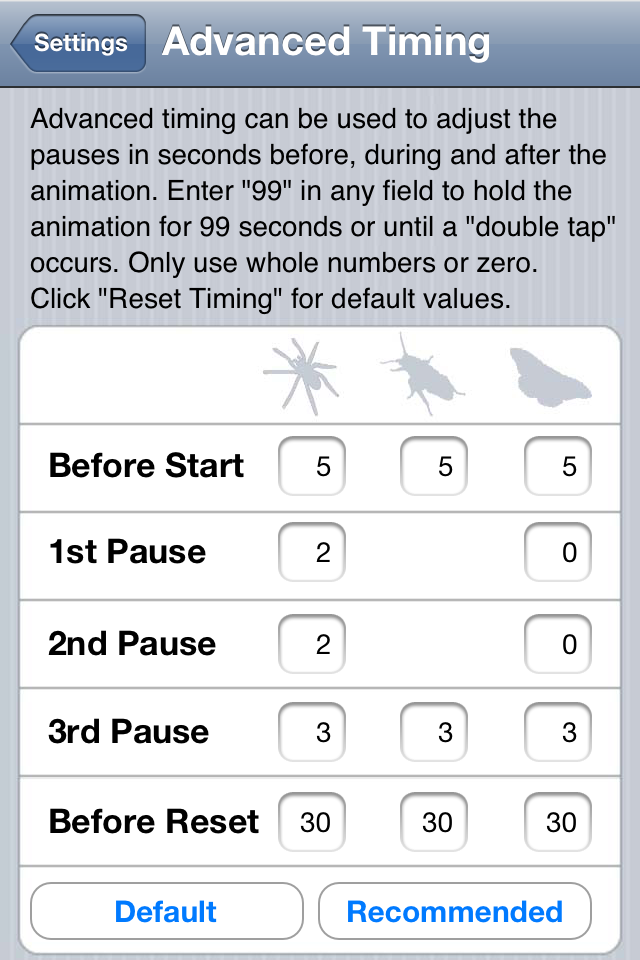
Advanced Timing
You can customize the pauses for the
animation to suit your style and patter. Pauses can be shortened or
increased in whole seconds. Click Reset timing/Default to restore the
defaults.
If you set the first two fields of the spider and first field of the
cockroach to "99" seconds then the animation will wait until you double tap
or "99" seconds which ever comes first.
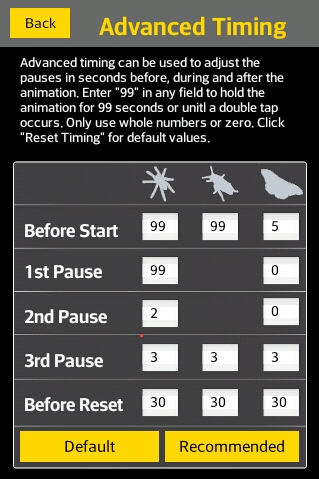
This allows you to have more control at the beginning of the effect instead
of it automatically starting 5 seconds after the photo is taken. I would
recommend you try this way.
Click the "Recommended" button to set the recommended timing but remember the spider wont come out until you double tap the bottom of the screen or for 99 seconds.
TIP: If you do the card revelation, you may wish to extend the time "Before Reset" to 50-60 seconds so you have enough time to reveal the card at the end.
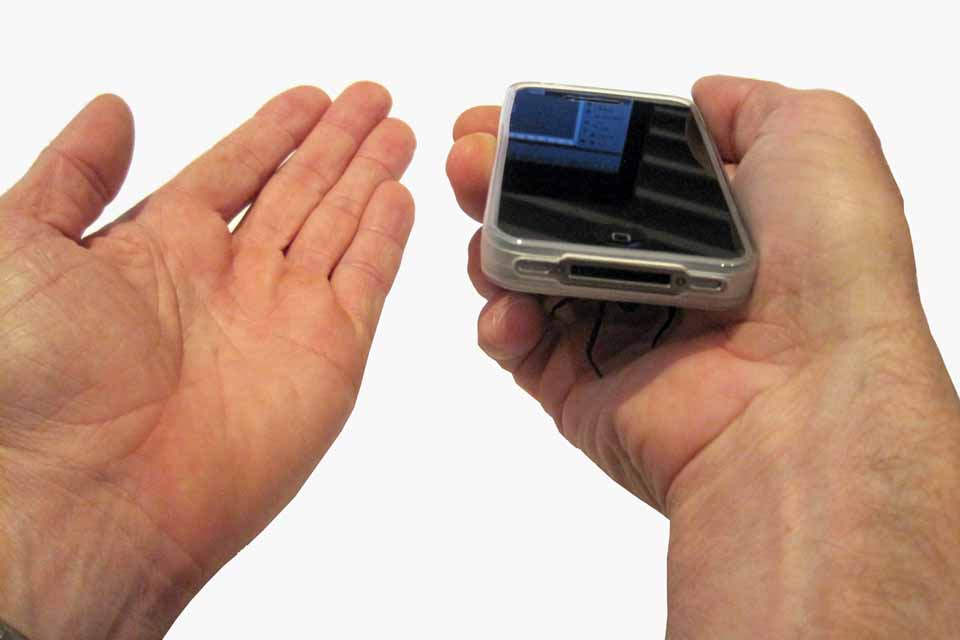
Loading the spider
Start with the spider in finger palm in your right hand (or left if you prefer) with the front legs of the spider touching your index finger and upside down so that the adhesive is facing away from your palm.
Cup your right hand slightly (so the spider doesn’t stick to the phone) and place the phone on top of the spider. Hold the phone now like you normally would. Similar to mechanics grip with a deck of cards.
Using the phone to capture a picture of the spectator’s hand provides
perfect
motivation for them to place out their hand for you.
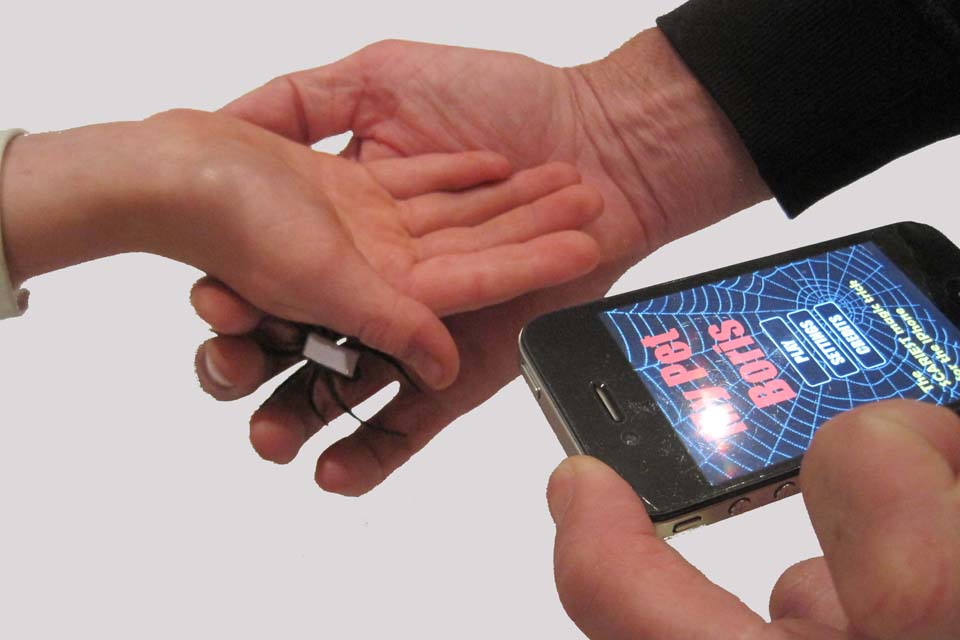
I activate the camera, then ask them to hold out their hand. I then take the camera in Biddle Grip with the left hand, then I reach out with my right hand and bring their hand towards the camera (loading the spider) so as to position their hand so I can frame the photo.
I take the photo then put the phone in their hand.
IMPORTANT TIP:
The phone should stay in one place after you take
it in Biddle Grip. Only move the hand with the spider. The load will then be
invisible because they will be focused on the phone.
It will feel like you take their hand from below and bring their hand to the
phone. The phone does not move.
The spider is automatically loaded onto the back of their hand.
If you are worried about them seeing the spider, you can rotate the right wrist with the palm towards you slightly and imagine that a line across your palm extends to a point just above the spectators head (Ramsey Subtlety) then the spider will not be seen but I don't think that is necessary and it may make it more obvious by being un-natural.
Suggested Routines
Augmented Reality Script – Spider
· Recommended Settings:
o Background - Snapshot
o Camera - Quality (ANDROID only)
o Flash, Vibration, Sound and Finger all on
o Startup Image On
o Press Reset to use the default startup screen
Setup
Palm the spider, cover with your phone and press START before you begin your patter. The spectator should only see the startup screen.
It's the easiest way to approach anyone if you see them using a smart phone and say, "Hey have you seen the latest app that uses "Augmented Reality? It's really cool!"
Who could resist?
Startup Screen
I say.."You've ever heard of Virtual Reality right?"
Listen and react to what they say and then continue with...
"Right”.. or “Well”…” Virtual Reality is like those computer games where you become a virtual character in a simulated world. It can be quite realistic the longer you play and you can do things that would be too dangerous to attempt in the real world."
Then I ask..."Now this app uses Augmented Reality which is similar but it uses the real world instead of a simulation so it's much more realistic."
As you say all this you are showing them the startup screen, that has the words "Augmented Reality" in large type.

Touch the screen to dismiss the startup screen and activate the phone’s Camera. Say, "It uses the phone's camera" and ask the spectator to hold out their hand. You demonstrate by holding out your hand.
As they hold out their hand, take the phone in Biddle grip between the Thumb and middle finger of your left hand, as you reach out and take their hand bringing it back towards the camera and position it to frame the shot. This loads the spider.
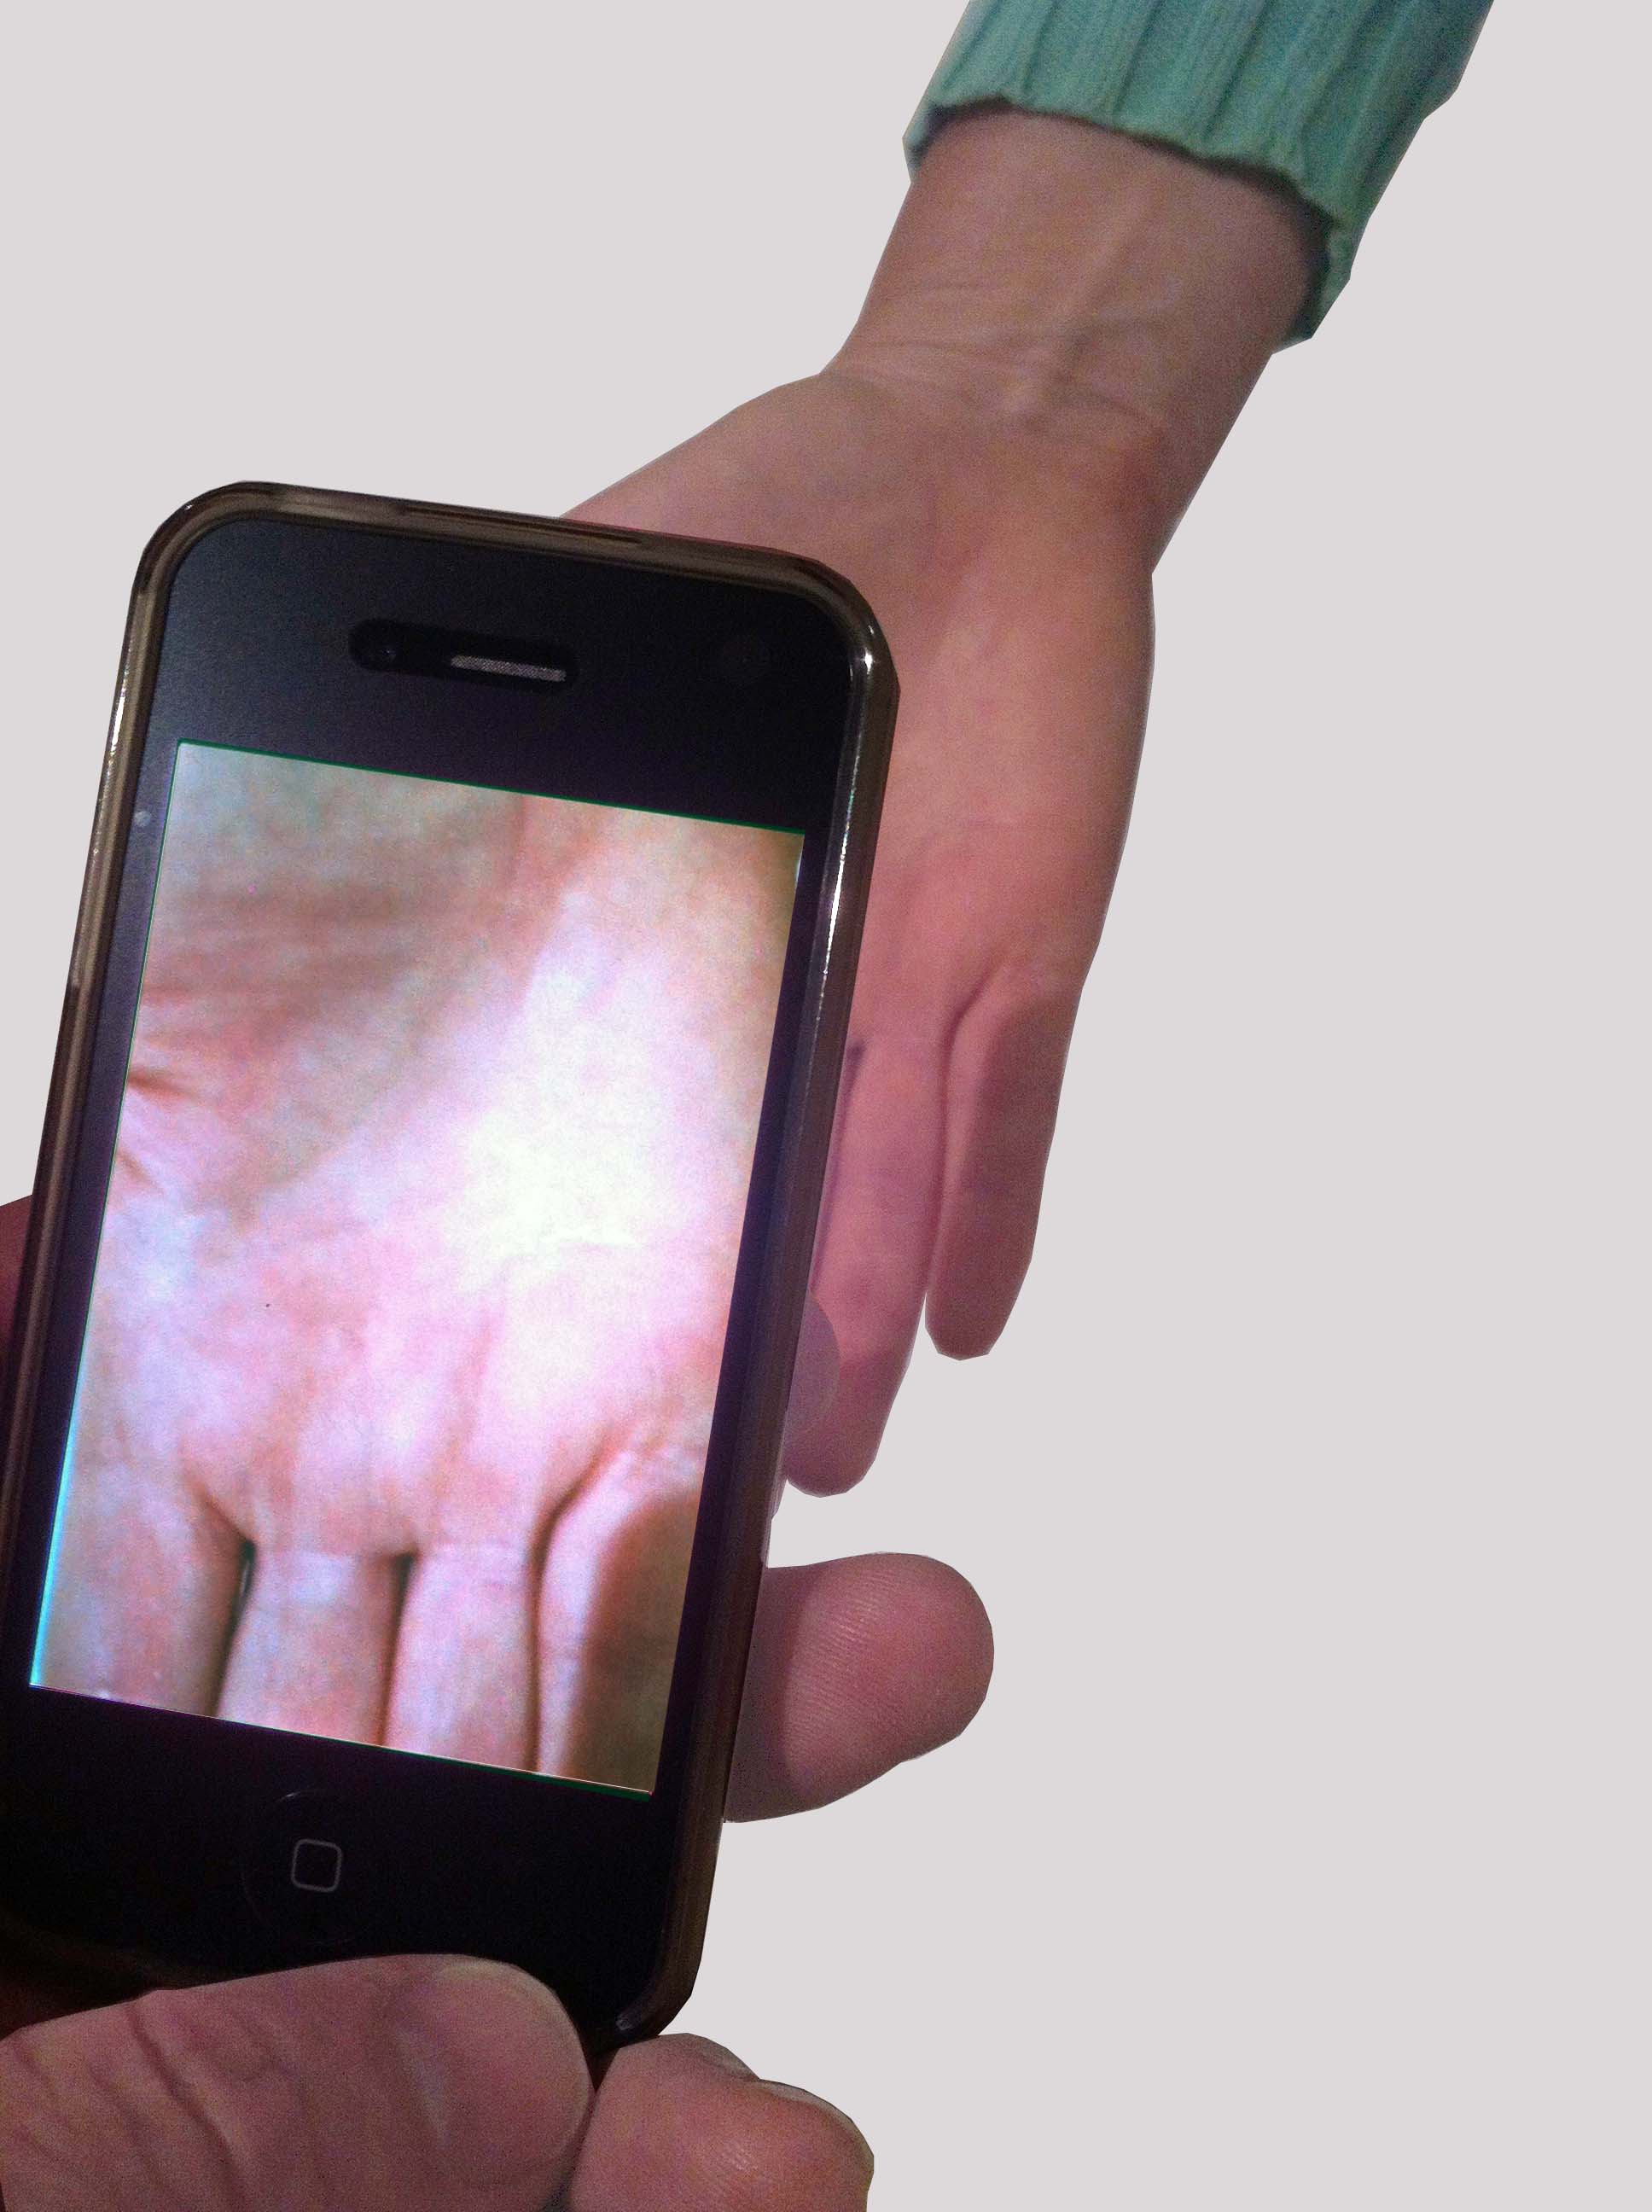
Try and get a shot of the full palm with just a little bit of the base of the fingers. Wait for the camera to focus, then press the screen with your index finger.
A press of the screen for about 1 second without moving your finger (long touch) is needed to activate the shutter. You will hear the camera shutter sound then place the phone on their palm.
TIP: Make sure no other part of your hand or fingers are touching the screen or this may register a multiple touch instead of a long touch.
I like to hold on to their ring and little finger throughout the performance. This allows me to keep control of their hand and what they do with the phone.
If I feel them pulling away as soon as they see the spider, I can quickly remove the spider and take my phone back. I think there is no need to continue if they have a real phobia of spiders. I won't be fun for anyone.
I say “The app now puts a layer in between the phone and your hand and introduces a little pet spider called Boris. Now Boris is an Australian Redback Spider. Normally this would be very dangerous..”
The spider stops a few times along the way, which allows you to tap the screen and encourage him to move on.
When it reaches the middle of the screen as I slide my finger under the phone in time with the animation, I say…
“With a smart phone you can do things that you would never do in real life”
After it walks off screen say...”Now it has a sensor on the phone and if you wave your hand over the top and say "Come here" it makes the spider comes back. See!”
This sets up for the finale.
When the spider walks across the screen you say.. “See…here you try”.
Take the phone back from them and tap the palm of their hand and gesture for them to wave their hand over the phone. This frees up their hand and also gets your camera back out of harms way.
When they wave their hand they will see the spider out of the corner of their eye and FREAK OUT.
End the routine by taking the spider off their hand with “That’s my pet Boris.” A final callback.
TIP: Some have asked to add the ability to have the app record video automatically at the end of the effect so they can capture the spectator's reaction.
I'm not sure about recording video without people's knowledge and possibly filling up your memory so it's better to ask another spectator to take out their phone and record the whole effect. You get a much better angle and you never know when you will get your best reaction.
Please avoid posting these reaction videos too widely on Facebook or YouTube as this trick has a definite "punch line" (i.e. Spider on the Hand) you don't want to spoil it for those that have not seen it yet. It's best to perform it in person to a group of two or three at a time.
Card Revelation – Spider
Video Presentation
· Recommended Settings:
o Background - Snapshot
o Camera - Quality (ANDROID only)
o Flash, Vibration, Sound and Finger all on
o Spider Card Startup Image On
o Press Reset to use the default startup screen - "ACME Card Locator 2000"
o Size card to suit your screen
o Choose the Red Bicycle corner
o Leave card on screen On
o Advanced Timing - Recommended settings with "Before Reset" 60 seconds.
Note: This routine is designed more for the professional magician in mind. I don't think it is that difficult to do, but maybe you find the original "Prank" easier at the beginning.
Video Tutorial for the Card Revelation Effect
Setup
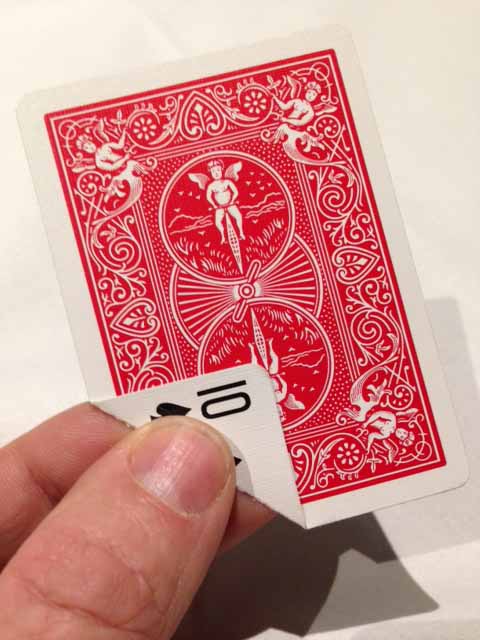
Tear a corner off any card from a red bicycle deck, place the corner face up in the holder on the back of your phone. (see above for details of card holder)
TIP: Fold the corner over half the width of the card. Fold it back and forth to give a good fold on both sides of the card then rip the corner neatly off. You will pretend to do a quick version this during the effect
Place the rest of the torn card on the top of your deck.
Stick the spider lightly to the back of your phone on a piece of non-stick paper.
Performance
Swing cut the deck bringing the torn card to the center and hold a pinky break.
Riffle force the torn card, then bring the torn card to the top as you re-assemble the deck.
Slide the torn card to the left, concealing the missing corner, showing everyone the chosen card. Put the rest of the cards away in your pocket or on the table.
Optional: You can place the card face up on top of the deck and have the card signed, covering the missing corner with your thumb.
Pretend to tear off the corner (practice tearing a couple of cards to get the feeling of doing this while looking in a mirror) then hand the torn card to your participant.
Pretend to vanish the corner.
a) You can false transfer this to your other hand before deciding to give it to them to hold.
b) You could use a smoke generator to create a magical moment as the card vanishes.
c) You could use a piece of flash paper and pretend to burn the corner, making it vanish in a spectacular way.
d) You could use a small amount of confetti/snow storm and rub or blow the pieces of the corner away
Once the corner is handed to the participant, act as if the corner has vanished and you don't know where it went.
Then say you have this new app that can help locate the card again.
Open the magic spider app and press over the card graphic next to "Meet the spider", don't show this screen t the participant.
The ACME Card Locator 2000 screen will appear.
Show this to the participant and explain that the ACME Card Locator 200 will find their card, scanning over their hand and lower arm. Then take a picture of their palm.
(A
bit of background for our younger users: The ACME Trading company was a
fictitious company made famous by the Willie E. Coyote and the Roadrunner cartoons. They
always sold these amazing products/contraptions that sounded really cool but never really
worked as expected.
That's what I had in mind when I came up with the premise for this trick. My
friend, Micheal Eaton came with the line "It has a few bugs..." so I think
it all fits together pretty well.)
Say "it is pretty new technology but it still has a few bugs. Actually just one bug, his name is Boris." as you double tap the screen to make Boris appear"
I then say "He is an Australian Redback spider, normally very dangerous" as I double tap the screen again.
He is very good at finding cards, he works cheap, just for a little belly rub.
As he walks off the screen I say: "look he is going off to find the card now" and I walk my fingers up their forearm or lift the cuff of their sleeve so Boris can crawl up under their shirt. This gets a good reaction.
When he comes back, I say: "Let's see if he found your card" and as the card reaches the center of the screen I touch the screen and move the card away from the web as he walks off.
You can take back the torn card and hold it against the card on the screen to see if it matches at this point while saying: "I think it matches?"
I then move the card around the screen a little then position my index finger on the card corner under the phone and thumb on top of the card on screen, and with a pinching motion slide the card out from under the phone at the same time sliding the card off the screen to produce the card.
TIP: Make sure your thumb contacts the screen all the way to the edge. Once the "finger touch" is within 20 pixels of any edge the card will vanish from the screen. Practice this a little to get the hang of it. It should look like you just pull the card out of the phone.
You now hold the card face down and you say, "Let's see if it is in fact your card?", slowly turn it over to reveal a match, then move it towards the other piece to confirm it is really the corner torn from the card.
Finally, say that "Boris likes to take a bow, so to make him come back, just wave your hand over the phone like this and the rest of you give him his applause". Demonstrate what to do.
If all goes well you should get a great reaction.
Augmented Reality Script – Cockroach
· Settings:
o Background - Snapshot
o Flash, Vibration, Sound and Finger all on
o Startup Image On
o Press Reset to use default startup screen
Setup
Palm the cockroach, cover with your phone and press START before you begin your patter. The spectator only sees the startup screen.
You can present the cockroach effect in a kitchen or a restaurant and ask "What is the last thing you would want to see in the kitchen right now?"
It seems that the cockroach is more scary in Asian countries than the spider so you can get very strong reactions from this.
Houdini Script – Magic Butterfly
· Settings:
o Background - Snapshot
o Flash, Vibration, Sound and Finger all on
o Startup Image On
o Press Reset to use default startup screen
o Caterpillar off
o Empty Chrysalis On
o Advanced Timing 5,0,0,3,30
Download the PDF
script for the Magic Butterfly effect
This contains a sample routine for the Magic Butterfly
effect as well as a page of printable butterflies so you can get started
straight away.
Where to get the quality butterflies?
We have bulk packs of 20 butterflies or a basic pack of 5 high quality PVC & plastic butterflies available from our online store. They also include the magnets and foil as well as some adhesive dots needed for the sample butterfly routine shown above.
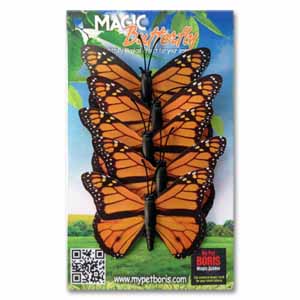
The butterflies were made from a photo of the actual butterfly used in the animation.
To print your own butterflies
Take the PDF file to your local photocopy or print store
and for best results print the butterfly page onto glossy film or photo paper
then cut them out by hand.
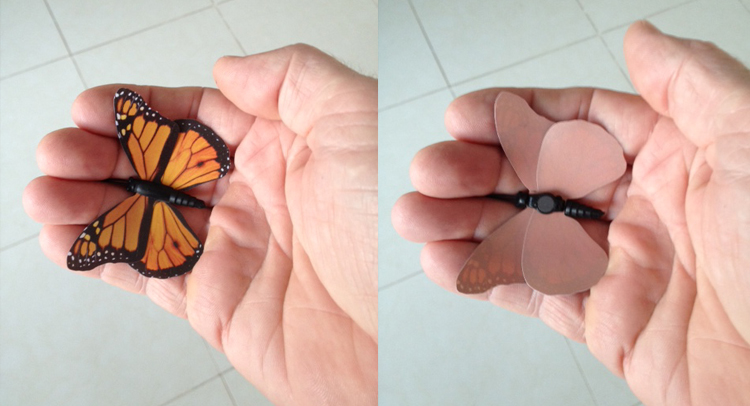
You can also print the closest skin tone to your own on the
back side or you could also take a picture of your own hand and print it on the
backside if you wish. This will help hide the butterfly whilst loading it during
the effect. The skin tone creates a kind of "Sanada gimmick".
Cut the butterflies out by hand and then give them away at the end of the effect. Use a flat adhesive dot to stick to the back of the spectator's hand. I would recommend ZOTS Singles - Medium dots for this application.
The butterflies that come in our Butterfly Packs have been specially made using a quality PVC material and a proper plastic mounded body. These are designed and priced so that you can give them away at the end of the routine. This can have a very strong impact and you will find that they will keep the butterfly and remember you for years to come.
You will also get a
couple of small magnets. There is a small barrel magnet which is used as the
"Magic Egg" which needs to be wrapped in a piece of the green foil. The
other flat round magnet should be attached to the back of your phone to
pickup the magnet after you take the photo.
I use one of the thin adhesive dots to stick it to the phone, then put a strip of sticky tape (Scotch tape) over the magnet to keep it in place.
I found a iPhone cover with a hole in the back over the iPhone logo then the magnet can protrude through that hole. The magnets have no effect on the operation of the iPhone.
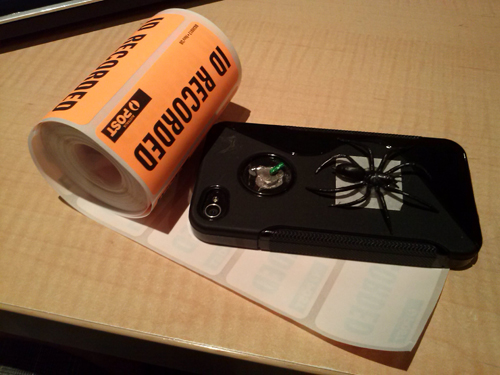
PRO TIP:
I also stick a small piece of backing paper, that I cut from a roll of
postal stickers to the back of my phone case so I can keep a spider with
adhesive dot always ready to go.
The adhesive sticker backing paper has two sides, The ZOTS only sticks
firmly to one of the sides so I have that side up. I use a layer of RHINO
Tape to stick the backing paper to the phone. It is stronger than the ZOTS
so stays put. I replace the backing paper every couple of weeks.
I can hold the phone up to show my hands empty, then with a small amount of sideways pressure of the fingers, I can drop the spider into palm without anyone suspecting.
